


Flashing is a small fraction of a building's construction budget—with a big job of keeping water out. Once uncovered, visible interior distress may be the tip of the iceberg relative to conditions within the wall. The subsequent effort, cost, and operational impact of repairs often disproportionately exceed the effort and cost of the original flashing construction.
In this complimentary, one-hour webinar, engineers Ryan Grabow and Sarah Rush discuss the importance and roles of building flashings. Relevant case studies ranging from a 1980s mixed-use building to 2000s commercial and residential buildings to more recent construction projects will provide perspective on the range of damage that can result from flashing failures and illustrate the careful detailing, workmanship, and testing options needed to achieve successful flashing.
By the end of the webinar, you will be able to:
- Describe common types and uses of flashings
- Explain when visual distress may warrant further investigation into the wall assembly and flashings
- Apply flashing principles for building envelope water management
- Compare the long-term benefits of quality measures during design and construction with near-term cost savings
more to learn
View this webinar in our interactive audience console to earn 1 AIA HSW learning unit, access related resources, submit questions to the presenters, and download a certificate of completion.
Sarah V. Rush, Senior Associate
LIZ PIMPER
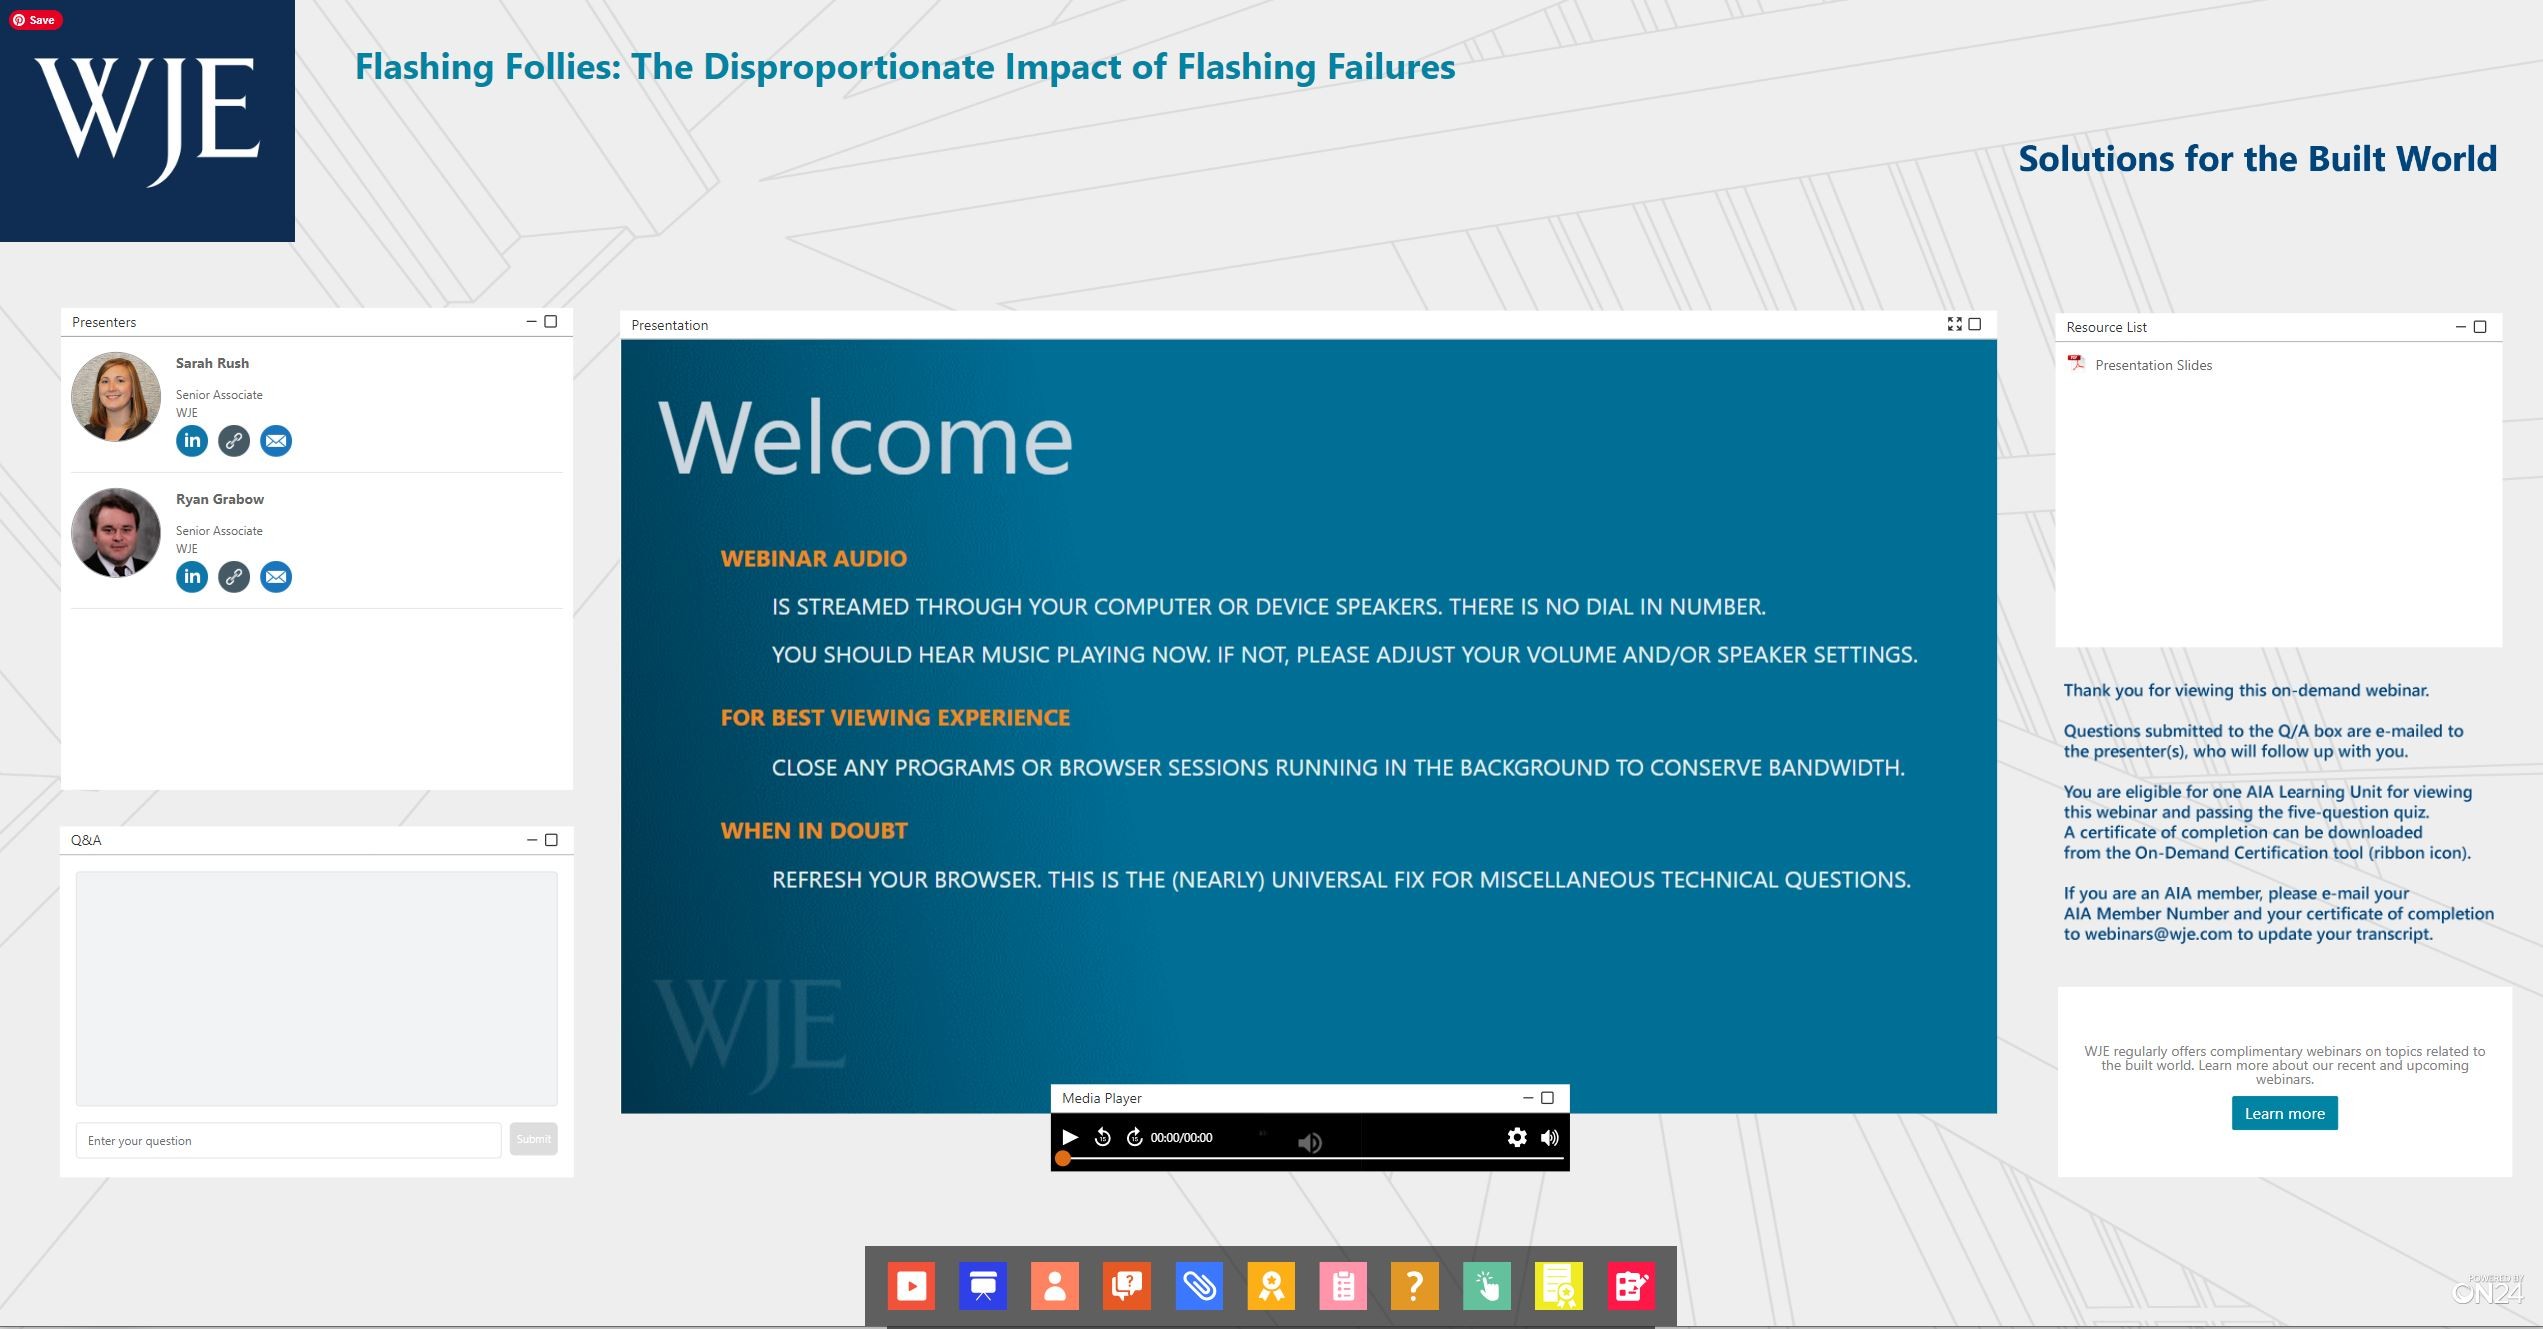
Hello everyone and welcome to today's WJE Webinar, Flashing Follies: The Disproportionate Impact of
Flashing Failures. My name is Liz Pimper and I'll be your moderator. During the next hour, engineers Ryan
Grabow and Sarah Rush will discuss the importance and roles of building flashings. Relevant case studies
will provide perspective on the range of damage that can result from flashing failures and illustrate the
careful detailing, workmanship and testing options needed to achieve successful flashing. This
presentation is copyrighted Wiss, Janney, Elstner Associates. And now I will turn it over to Sarah to get us
started. Sarah?
SARAH RUSH
Thanks Liz. All right, so the goals of this presentation are that by the end of today you will be able to
describe common types and uses of flashings, apply flashing principles for building envelope water
management in general, explain when visual distress may warrant further investigation into the wall
assembly and its flashings, and compare the long-term benefits of quality measures during design and
construction with the near-term cost savings of maybe omitting some of those QA/QC elements.
So today we're mostly going to be focusing on interface detailing and through-wall flashings in rain
screen assemblies, which is where water is meant to penetrate the cladding, travel down in a drainage
cavity and exit the wall assembly at different flashing elements that are collecting the water and driving it
out. But the principles that we're discussing today and the case studies and what we found and
recommend are really going to apply to all different flashing systems including roofing systems. It's
important to note that this is a component of the overall water management system in a building. We
won't be diving into water-resistant barriers or air barriers today very much, but these are kind of the
elements that collect the water from the WRBABs and direct it out.
So overall flashings are a very small fraction of the building's construction budget, but they have a very
big job of keeping water out of the system. Interior distress, once uncovered visually or becomes affecting
operational aspects, may just be the tip of the iceberg of what you're seeing within the wall assembly, and
they can really have a disproportionate impact to repair them versus getting them right the first time
during the original construction effort.
So today we'll be discussing an overall basics of flashing just to kind of get everyone on the same page
with different terminology. We'll be talking about three different case studies that showcase several
flashing failures and the range of damage that can result from them. We'll dive into a few lessons learned
and tips for obtaining successful flashings in the future or remediating those that may already occur and
then we'll open it to Q&A. So with that I'll turn it over to Ryan and he can dive into flashings.
RYAN GRABOW
Thank you, Sarah. Before jumping off this slide I'd like to draw your attention to that upper right photo.
This is kind of an example of a very simple basic of a small folly. So, the contractor made a small change to
the aesthetic piece that occurs above that horizontal piece of flashing and it resulted in instead of water
being able to drain out of this system, water got held in the system. So when we talk about flashing follies,
flashing is supposed to get the water out or keep the water out, and when you wind up retaining that
water, that is not what you're looking to do.
So if we go to look at a definition of flashings, if we turn to the 2021 International Building Code, their
definitions section, you'll find flashing isn't actually listed. So it's not one of the items that they list. If we
roll back in time, you can find some archaic uses of the word flash that is more like splash, to fill by a
sudden inflow of water. So this idea of water movement being related to the root word of flash does have
precedence, but over history we lost exactly how we got that term flashing. If we look back to the code in
the exterior wall section, you'll find that we do have paragraphs that discuss flashing and they discuss the
purpose of it to prevent moisture from entering and redirect that moisture back out of the wall.
Where do you need the flashing? It discusses many locations including perimeters of exterior doors and
window assemblies, penetrations and terminations of exterior wall assemblies, exterior wall intersections
with roofs, chimneys, porches, decks, balconies and similar projections and at built-in gutters in similar
locations where moisture could enter the wall. So lots of locations, it hasn't really told us what flashings
are, but we understand it's to manage water and that we have to place them in many locations,
particularly at intersections of systems or different changes in play.
If we look at the roof section, we have another paragraph that talks about flashing and similarly
preventing water to enter in various locations that it's required. As you dig deeper into the code, you'll
find specific pieces of flashing do get discussed, and when you get to those, you can find areas where
explicit material dimensions and requirements are listed. But there's other locations where the code refers
to manufacturer's installation instructions. So we can have a wide variety of materials that get used to
make the flashing.
Some of the other terms that might run across while working with flashing is water shedding and water
tight. Another term for water shedding is shingle fashion, so we'll get to that in a moment, but the head
flashing, so at the top of the skylight, that portion needs to be a water tight part. As the water comes
down, it hits that flashing and water can get held and retained on it so it has to be able to withstand that.
As we get around to the side of this, you see that several pieces of metal that are slipped in underneath
the shingles, those are on the side of the skylight and they are step flashing. That's a water shedding type
of flashing, so those are not sealed. If you had water pushing up those, you could actually bypass that
flashing, but it's using gravity in that water shedding manner to direct the water down.
We'll also run into exposed and concealed flashing. So here at the upper image, we're looking at a roof
that has exposed valley flashing. At the lower image, the asphalt roof, this is a closed cut valley and it has
some concealed flashing. This is a valley type of flashing, however, in the asphalt section you'll see it
referred to as a valley lining, but many of the other types of roofing, we'll call that a valley flashing.
Another type of flashing we might run across is various types of penetration flashing. So here we're
looking at a vent stack and it's got what we would often refer to as a boot type flashing. So this flashing is
molded and goes over that round penetration and interfaces the round vent to the flat roof surface.
We also run into rigid and flexible flashings and we also have the terms flashing and counter flashing. So
this is looking at a roof to wall interface and as that roofing comes up, it's a PVC, polyvinyl chloride, roof
and it has a piece of roofing that turns up onto the wall and that's essentially the base flashing going around the roofing membrane. So that from the roofer's perspective is their flashing. Above that flashing we have a rigid piece of counter flashing, so that counter flashing, the purpose of it is to protect that top termination of the flashing below it. And if you look at the detail, you can also see that there's an additional piece of that wall flashing that comes out and has receiver for that. So we really have three pieces of flashing in this small detail.
Another term, we revisited that shingle lap term, if you look again, we have a shingle fashion style lap from that counter flashing over. So this idea of the piece on top is laying over the piece on bottom gives gravity the means to drain the water onto the surface of the material below. When you don't have that shingle lap, you wind up with what's often called a reverse lap. So this is again looking at a step flashing. It has no counter flashing protecting the top of it. So you can see water can roll down the surface of that wall, the stone wall and it can go behind that step flashing from the roofing. The result of this on the interior is water was able to saturate the sheathing to the point that the sheathing was fully deteriorated when you opened up the wall and looked at it from the inside. So pretty severe interior damage with really no damage observed on the outside other than the inappropriate condition.
So we talked a little bit about top terminations. Often what you'll see is a pressure bar type termination, so keeping that top held in place is very important. And then you see there's also sealant at the top. The green membrane is overlapping in a shingle fashion, adding an additional layer of protection to that top flashing. So we really want to protect these and over the long term gravity is going to be working a lot longer than sealant does, so that type of shingle lap approach is great, but we need to make sure the top stays in place.
Down at the lower image we can see a side lap. So as these pieces of flashing come together, it's important that those remain watertight. So there's an additional layer of material, of mastic material that's being used in this side lap to maintain that seal.
Another form of flashing that we'll see is that windows and doors, you might have a sill pan underneath them. So this is from a sliding glass door, we have the sill pan goes underneath and we want the water to be captured and directed out. To be able to direct it out, we need to stop it from going inside, which is where we have the back dam and we want to stop it from going off the end so we have an end dam. That leaves the front end of this open for the most part, or if it is sealed, we need to leave intentional openings for the water to get out, and that's where weeps come in.
So in this case, this is a masonry weep using a corrugated plastic component. And if you look closely, that weep is sitting all the way down on the metal flashing. You really want to make sure those get all the way down that you can because any elevation that it has is additional elevation that water has to build up on the inside before it can get out. We also have a projecting drip edge here. So the idea behind a drip is to get the water to drip off of the wall without going back and hitting the wall. This is kind of a projecting metal drip, but if we have a projecting stone, these can also be formed by a groove on the inside of the stone and that's still considered a drip.
Here's an image of what your kind of typical section details might look like and these can help you solve a lot of problems. You can cover the types of materials, the image on the left, you can see we're paying attention to how anchors are going to be aligned with our flashing. We want to make sure that nothing is
penetrating our flashing that goes through the back of it. And then on the right we're paying attention to how is that window attached so that we don't wind up with the window installer installing screws or things being installed upward and drilling through and compromising our flashing as well. So lots of great information you can cover in just that simple section detail. But often at these corners and intersections, the issues are a bit more complicated and you might need to go to an isometric detail.
So here's a few examples of isometric details. Some of them show a build of the material, so sequencing of how it's done, and that can be done either by showing several steps or we have kind of a cutaway type isometric on the right that shows the build in one image by simply showing different pieces as they're installed.
In the industry, you have a lot of detailing resources to help you, but keep in mind that these are generic type resources. So SMACNA, that's the Sheet Metal and Air Conditioning Contractors National Association, they have an architectural sheet metal manual and that is basically what the sheet metal trades use to train people on how to construct flashings and construction sheet metal. NRCA, National Roofing Contractors Association. They've got several good books that are the roofing and water proofing manuals that have a large number of those isometric details that are great for reference. On the right we're seeing an example from the International Masonry Institute's Masonry Detailing series. And then in Michigan we also have the Masonry Institute of Michigan that also publishes a nice series of design details. These are available to get trained on, but you really do want to make sure that you're taking and incorporating and making it project specific as to what you want because they may have several ways of approaching the same detail.
With that, I'm going to turn it over to Sarah to get into our first case study.
SARAH RUSH
Thanks Ryan. All right, so I'll be covering two case studies here today and the first one is discussing flashings at stone claddings. So this is a mid-200s commercial building. It's a steel frame structure with concrete block, infill walls or metal studs with wood sheathing depending on where you are within the building. We're going to be focusing on stone claddings, but there's multiple surrounding cladding types and penetrations at this building that the stone cladding flashings need to tie into, including metal panels, siding, curtain wall, brick masonry, lots of different detailing that exist. There's also a couple hundred feet length of skylight that runs along one of the walls that we will be discussing today. And this is meant to be a rain screen assembly. So again, it's meant to have a drainage cavity, water's meant to get into these porous stone elements and find its way out further down in the wall assembly.
So there were issues present at the time of construction. Those issues were kind of resolved and handled at that time. We're talking about 10 years later where there was some isolated conditions that the owner wanted to be resolved. So they brought us into the project because they were having in certain rain conditions, certain wind-driven events, some isolated water staining that would occur in between a skylight and an interior cladding. So in this project the interior and exterior cladding is the same, just to avoid some confusion moving forward through the photos. They were also having some issues where water was also dripping from the skylight itself and the base of the skylight.
During our initial project we were walking the site and we commented on how significant some of the exterior conditions were with regard to efflorescence or white staining, some organic growth or the black
staining and what looked to be some scaling or spalling of the masonry elements and they said, "Yeah, it gets dirty quite often. We're cleaning the wall every four to six months," which is a pretty aggressive schedule for cleaning.
And then just for a gut feel, these instances of water on the inside they were maybe getting once or twice a year or once a quarter, so pretty minor, but this was a public space in a main lobby area so they had customers coming in and they wanted to see it resolved or want to know what could be done to have it resolved.
So we were moving forward with the investigation and the findings, but I'm going to breeze over some of this briefly because I think the construction photos with the exposed flashings do better justice to kind of show what issues were present.
So moving into our investigation, we conducted document review, visual surveys, purposely performed diagnostic water infiltration testing, which is where you spray water on the building and try to recreate the leak. And then with those findings, created some exploratory openings of actually removing the stone and seeing the conditions below to confirm what our tests are seeing. And overall we found several design and construction issues that related primarily to the flashings themselves. And so in the image to the right you have three green elements, the top one is your coping flashing and then the two lower ones are through wall flashings at shelf angles, one of which dived in right on top of the skylight and ended up overloading the skylight system having some water. The water occurred inside due to that overloading and rate of water that it was seeing, but really that was just a symptom, it was the through wall flashing itself that was really the cause.
So here are some photos of construction. On the left you have the stone removed with some of the wall anchors exposed. So those hold the stone back from kind of leaning out forward over time and those penetrate a two component through wall flashing. So the top pieces is counter flashing and the bottom is your sheet metal flashing over your shelf angle. On the right, we found a significant motor droppings throughout all the shelf angles on this project. This was the main source of the staining that we were seeing on the outside. So this amount of four inches tall of border wasn't letting water get to the exterior as fast as it was designed to.
At each of these penetrations for the flashing assembly where the stone anchors are anchored back, we found significant voids. Here's just some images of them there. Multiple materials were used, many different attempts, but for the most part all of these ties had areas where water can enter the wall assembly and was entering the wall assembly.
We also found instances of detailing at joints being a source of water, so whether that's side laps or laps not aligning correctly and creating voids. Either way, we were getting water inside that was corroding or rusting the structural steel elements and shelf angles behind it. We also found instances where the flashing didn't have adequate support and so over time it was starting to sag. So with flexible membrane flashings, you really only want to have them span about a half inch unsupported, otherwise they will want to droop and sag and those joints inside laps will want to pull apart from each other, leading for water getting in. On the right, the substrate actually did not continue and so here we have a shelf angle that kind of dives into a vertical column and stops. And so instead of continuing the flashing all the way around to the edge of the wall and around the corner, it was discontinuous now, so they actually stopped
the flashing, which meant that any water that was applied or rained on this region and soaked in could run multiple stories down to grade.
This instance of the column and shelf angle came up quite a lot where they intersected each other and created a discontinuity in the sheet metal flashing. And here's one instance of kind of how that was handled in the field. If you could kind of think of flexible membrane flashing being used like a Christmas wrapping, wrapping a present, here you've got maybe 20, 30 pieces of individual membrane flashing that is trying to detail around the column. Here's what that looks like on the inside and just some other instances of how the attempt was to flash these intersecting and discontinuous elements, and at all of these conditions really moisture was able to penetrate whether that's an adhesion issue or a joint issue or an alignment issue of the flashing that was installed. And because of these issues, we were noting decay of the wood sheathing in particular as well as some corrosion or rusting of the metal studs. But luckily for the shelf angles and the structural steel members, we caught it early enough that those elements did not have to be repaired.
But overall, this project was conducted over multiple years to repair the shelf angles or the flashing issues that we're seeing in order to resolve those issues for the client. It involved removing many elements, not just the stone but also some louvers and some window issues, penetrations. It was over $2 million worth of repairs and to get you a sense of scale, the cost of the flashing elements themselves are fairly cheap and so the cost to actually get to them and expose them is really 10 to 15 times the cost of the flashings themselves.
And overall, this project also had implications on the operation side of things. We were having to shut down of the main public lobby in order to conduct this work. But again, luckily we were able to catch it pretty early so that the stone didn't deteriorate such that it would need to be replaced for instance. That's not quite the case in case study two, as you'll see. So this case study is focusing on flashings at some door sills of some sliding glass doors at balconies and terraces. So this is also a mid-2000s building, but it's actually a residential condo and it's a pedestal system. So the first story of the building is concrete framed and everything above it is wood framed or wood construction. This was a very architectural building, so it had multiple different types of siding and metal panels, brick masonry, concrete block, again different cladding types that needed to be able to interact with each other. It also was not just a pure rectangle, it had lots of ins and outs, especially with the balconies and terraces, which became quite an issue later on.
So this project, again, from the time of its construction had occasional moisture issues that owners reported, which we'll talk about in a second. But we were actually brought in more pertaining to the sliding glass doors because a few of them started to not be able to open all the way or close all the way and we were retained to try to investigate why and how to fix them. Again, that was about seven years later so a lot of what we'll be talking about is really shortly after construction.
So this is an instance of what the owners were seeing prior to the sliding glass door issues. So some cracked drywall, some paint blistering which had been painted in the past and replaced in the past but the issues kept occurring. The right is actually from our visual survey where the ceiling was also not only cracked but displacing downwards. So to adjust these issues for the client, we conducted our investigation, so again, a visual survey, document review and diagnostic water infiltration testing where we're trying to confirm the leaks that are being observed. And our main findings were that the design documents really lacked direction regarding the sliding glass door sills and those sliding glass door
flashings were really the main component of the water that they were seeing inside, and these sliding glass doors occurred at balconies and at terraces.
But I want to focus a little bit in here for case study two related to issues with the design. And so in case study one we focused a lot on maybe the construction installation, but here the design itself was not serving the project. So for instance, really this cross-sectional detail, this 2D detail was the bulk of the information provided by the designer of what expectations and quality they wanted. So it talks about extending the self-adhered flashing membrane from the top of the door sills down to all benches and counter flashing to achieve a waterproof connection.
Later in the documents, it also refers to manufacturer recommendations, code, also a local masonry recommendation entity, which Ryan noted before is a great resource, but those really are pertaining to masonry systems, not what was present here. And then wanted to achieve the highest quality of construction techniques to allow zero water infiltration, but really didn't really say how or why that could be achieved, really leaving a lot of work to purely contractor and field-driven more so than design and expectation side of things.
So once we were done with the document review and based on the water testing, we did mention how water was getting in at these door flashings. So to conduct the repairs, we conducted exploratory openings to verify the existing conditions and as-builts and then develop repair drawings in the hope that repairs could be completed on a unit-by-unit basis. We'd open an area up, we would see what we'd find, we'd develop repairs and then implement that work to move to the next location.
What we essentially found is that our weather-resistant barrier for the walls were held well above the base flashing, not shingle-lapped in with the sill flashing. The sill flashing contained many of the same voids that we talked about in case study one. Some different conditions didn't match, but most importantly on this project we found quite a bit of structural decay. So where the flashings and the sliding glass doors meet the balconies, here's kind of a typical instance of what we found and decay of the structural elements below, whether that be beams supporting the exterior wall or trusses that support the balconies.
Here's just some more views underneath the sill flashing of additional decay. Again, seven years later. And this corner in particular I wanted to highlight just to show kind of the extent of what can happen in just a short years due to deficiencies with the flashing. We're going to focus in on this location here.
But before we do, this is at a building corner where the sliding glass door flashing is needing to transition to a small strip of siding for the metal siding at the corner and turning around the corner as well as the normal interfacing with the balcony itself. So you have a beam, meaning a girder, a column above but without a column below for multiple feet in any direction. And these are some of the photos of what we uncovered at this location. So the extent of decay in both the beam, the girder and its connection were significant and starting to create deflection of the wall above.
One thing I want to highlight here is just the load paths here were not very easy to deal with, there was not a column below. We ended up adding several columns to this building to facilitate repairs and replacing a lot of elements due to this extent of decay. Following the wood structural repairs, then we had to dig into flashings as originally attended of how to improve the sill flashings specifically at the doors and adjacent to improve this issue so it didn't occur again. So here you have two normal two-dimensional detailings below the doors and at the base of the wall.
But we also wanted to showcase what to do where those things meet considering the new substrate conditions. And to do that we also included stepped flashings so you could see how different portions of the flashings progressed and the redundancies that we wanted to create in the system so no matter where water got in, it was able to get out. We also wanted to show how those flashings would be terminated integral with the balcony waterproofing or terrace waterproofing and how they interacted with the jams at the sliding glass doors, and this is one way to do it with this color-coded stepped isometric detail.
Again, this project was multi-years. I'm sure you can imagine it involved removing many more cladding elements and building elements than one might have thought, including stripping entire balconies of their finishes, terraces of their finishes affecting units below that we didn't necessarily anticipate being impacted, and significant cost to repairs. So to harken back to case study one where the work to expose the flashings was 10 to 15 times the flashings itself, this is substantially more than that just to repair these flashing elements.
So Ryan will be here to discuss case study three, but hopefully you're getting a feel for flashing follies and the damage they can do.
RYAN GRABOW
All right, thank you Sarah. So case study three, we're going to be looking at a 1980s construction. This is about 11 stories, a masonry exterior building steel frame, and we have a series of these terrace balconies at the upper floors. So the pieces that you're seeing right now in front of you in that front image we have some of the coping and you can see that there's a metal coping that's been applied over top of on the further balconies you see those stones. So this was one of the many attempts to handle the water infiltration that they were having. Some of these balconies also had these planters and you can see the blue tarp was another prior attempt to try to isolate where that water was getting into the wall, so several attempts.
These walls are actually an engineered brick masonry for the parapets around the terraces so two weiss of masonry filled with steel rebar and concrete or grout and that's kind of the structure at the parapets, down below you have a veneer masonry. There's also some sill pan flashing issues that were happening at this building, but those were a very minor part of their problems so we're going to focus on the wall issues here.
Some of the symptoms that we saw at the tops of the windows, at the heads of the windows, the soffit was having some severe distress in locations. They would get water on the interior stools, the jams, some water damages on the ceilings, and we would also see some streaking on the glass, kind of a rust-colored streak that would occur on the glass. And one of the things that we wound up doing was going through and doing a visual survey so that we could map out all the locations that things were happening and that really helped us focus on, yes, the issues that you're having are almost all related to beneath these balconies.
So the main problem that we wound up having, if you look at the section on the left, initially when we got involved, a contractor was involved, they had replaced the, you see a soldier course or a vertical brick that's sitting above the window at the bottom of the section on the left. They had gone through and replaced that flashing but it was still leaking and so they had opened up higher up at the floor level. So at the image on the right, we are looking through the wall at the floor level of the balcony. So the middle
piece of that is a bent plate, that's the floor. Above the orange arrows, we're looking at a PVC flashing, which was typical for that time period but is generally not used anymore. You can see that's not continuous where those orange arrows are. We also had a number of penetrations that happened with all those steel rebars that went through that.
But what's happening is that water was coming down, it was rolling down the face of the structural edge of the slab and when we got to the sheathing down below, there was no coordination regarding the top of that and water was just rolling in that bent steel plate and dropping in behind the wall. So there were issues down below at the headers that they had replaced and we had issues up at the floor level.
So in construction someone had good intentions for slope even though we didn't see flashing at that level on those details. You can see the image on the left kind of a section through here and that construction that we talked about with the concrete filling the brick. On the image on the right, you can see a blow-up, we have that PVC flashing that they've put slope and they've put slope to drain inwards towards the balcony. But you can see there's no real penetration detailing at the rebar. And so as the water came down and you follow that blue arrow, it's following that rebar down and you can see the good quality that rebar is, where it was embedded in the concrete as opposed to the corrosion that's happening below. That's a little more apparent on the image on the left with the orange arrow. But coming back to the right, you can see some of the staining that's occurring on the other orange arrow at the bottom where that rebar is corroding.
If we continue further on that slope, so that rightmost blue arrow, that flashing was sloped to come out onto the balcony, but at some point someone decided to fill that area in aesthetically and so here's another place that it got blocked. Also, keep in mind a number of these balconies, we had those planters which they had typically gone through and installed waterproofing directly against that wall, blocking this path for water.
So when we get to this view kind of looking from the outside, we had kind of three major points of entry with the balconies. We had obstructions where that flashing was and we had water entering at that floor line and then there were also issues at the head of the window where we have that shelf angle condition.
When we get down to some of these shelf angles, if you zoom really far in to the details that were existing, there is a small bit up that appears there was an intent for that PVC to stick out to make a drip, but you can see that was constructed with this PVC recess. Now when that's recessed, the water doesn't make it all the way out and off the wall so it had opportunity to roll right back underneath the flashing and sit on the steel. You can see the mortar is separated from the steel below and that's because corrosion is thicker than the original steel and it was actually lifting the brick making that separation. So this was a condition of a typical shelf angle that we encountered. Thankfully, even though this doesn't look great, it's really not that much corrosion and there was a little bit of reserve capacity in the original design and we did not have to replace any of the shelf angles. So we caught this one early enough to avoid real structural repairs.
Some minor corrections. When you're dealing with the membrane flashings, you do want those recessed. The image on the right, you can see some of that membrane bleed that occurs with it, and this is an example of a progression of that bleed. It can become quite a cosmetic and undesirable. It's not so much a water management problem there, but is an undesirable effect of some of the misapplied flashing.
Now as far as access to do some of these repairs, this gives you a perspective of just how much access effort they had. This was a zero-lot line construction, so above the sidewalks they had mass climbing scaffolds. On the terraces, they had to build these pipe scaffold structures. And then on the walls that are above other buildings, they had to work off a swing stage. So a tremendous amount of just access effort to get there before you even do any work.
And this is an example of the removal process. You can imagine that it was less than pleasant for the occupants with them doing all this work, keeping in mind that those parapets had concrete in there so there was a lot of chipping hammer work in order to get that concrete off, which would reverberate in the building.
Some other obstacles, remember we have all these planters and there's a roof drain. Some of those planters were designed and built right on top of the roof drain, creating another undesirable obstruction, so concealed damage. The image on the left, there was actually fairly minimal damage on the inside, but when we pulled the exterior off, you can see the severe deterioration of the sheathing. Image on the right is another type of location, this is more at the intersection of the corner, so water getting down behind the flashing there and just another image of that severe deterioration of the sheathing down below one of these corners.
So field soldering, we had to do a fair amount of field soldering because the complexity of these. In order to do that, the masonry had to get rebuilt up to a certain height, the sheet metal contractor had to come out, he had to measure each particular corner and he had to go fabricate those because the dimensions varied between them, get back out here and then field solder it together and then the masons could continue. So you have to imagine this really caused a lot of sequencing challenges for the contractors and just with all the access, figuring out what pieces we can take down and what pieces have to wait. There's a lot of effort just to figure out the sequence of pieces in order to get each piece lining up and lapping correctly.
Splices and soldered corners, we used this type of a concealed splice on the shelf angles. That sealant in there is doing a very important job that needs to be full and continuous, think of them as little gutters that drain any water out that gets between there. So you need to make sure you have enough sealant that it's continuous, but you don't want so much that you block those gutters draining out. Inside and outside corners, we got a lot of these pre-soldered and that really does help. They're able to put that corner in place and pretty much move on just like the other laps rather than having to fiddle and trim and cut the corners together.
So to give you an idea of the magnitude of the difference, the image on the left, the blue is the types of balconies we were working with and the orange is all those shelf angles that we were talking about so that gives you an idea of the scope. But if we estimate the actual flashing cost is just a small portion of all the work that had to come because you had all of that material removal, reconstruction, access costs. So really many multiples to get there and get to that flashing in order to be able to repair it. So there's a lot of value in getting it right the first time.
So now I'm going to turn it over for Sarah to wrap up with some lessons learned.
SARAH RUSH
All right, thanks Ryan. So just to cover a few lessons learned here, just some big overall takeaways. Flashing elements are really a team approach and multiple members of the team, whether it's the designer or the owner, maintenance down the line or the contractor, they all have a different role and responsibility to ensuring that some of these flashing follies don't occur.
It's important for all stakeholders to be involved during the project. Again, flashings by nature really are quite project-specific. So yes, there's great industry-typical details and a lot of two-dimensional details show what typical conditions are present, but especially where different systems intersect or where there's goofy detailing that is beneficial to be detailed early on in the project or thought about early on in the project, so much of the flashing systems themselves are project-specific and aren't really relatable from project to project, they really need to be developed for each given situation.
Besides that overall team approach, I hope it comes off across how important it is to investigate these systems early. Flashings and claddings really hide deterioration within them. But one kind of good rule of thumb that I would recommend is if multiple repairs have been attempted and they haven't addressed the issue, that's when it's maybe beneficial to bring in somebody to investigate it further because maybe just the symptom is being addressed and not the cause. One, get on my soap box here, but sealant is not always your friend. So in this image you can see how in a drainage cavity system, sealing something shut that's meant to be open is really difficult. If this sealant is removed, then maybe that original weep system can perform as it was originally intended.
Some other quick take quiz, again, to achieve successful flashings, careful detailing and workmanship is needed and performance testing during the work goes a long way in verifying that the flashings are being performed and are watertight as intended while the cladding hasn't yet been installed for instance.
Another tip maybe to take away to achieve successful flashings is to have construction observations during the work. So whether that's by having a manufacturer's rep come out or the architect of record or a third party testing inspection agency can verify that the flashings are being installed in accordance with the drawings and the manufacturer's recommendations to provide some of that QA/QC during the work.
Third party reviews might be something to consider whether that's retained on behalf of the designer just to get a second set of eyes at some of those odd intersecting cladding regions or as a requirement by an owner or a few times we've served for a general contractor. So a general contractor may bring in a design entity to review the documents and help them submit RFIs sooner in the process for maybe some detailing that's not clear or where the substrate conditions make it difficult to install or could make it difficult to install.
For existing buildings, kind of troubleshooting issues that may be occurring or that you may be struggling with, we talked about several of the options here, but one thing that we hadn't touched on was non-destructive evaluation tools in the toolkit to kind of help identify some of these issues sooner than later. So whether that's thermal imaging or moisture imaging, each one of those are often project specific and may be able to be used to help troubleshoot an issue sooner than some of the other avenues such as water testing and exploratory openings.
So those are the main takeaways. I hope you found this presentation useful. Liz, please take it away. Thank you all.
LIZ PIMPER
All right, thanks Sarah and thanks Ryan. All right, let's take our first question. I believe this is about the first case study, "Based on the contract documents, were these issues due to poor workmanship or inadequate flashing details within the drawings?"
SARAH RUSH
Yeah, sure so I can take this one. I mean, a little bit of both really in all of these case studies. So some of our images focused more on the installation issues, but a lot of the details, like for the shelf angle for instance, a shelf angle flashing detail was repeated 20 times within the drawing set and kind of verbatim copy and paste in different locations. But what was omitted in some cases what was what to do where the claddings intersected with each other or at the end of a wall or at the end of a detail kind of what do you do there? So having more detail on the design end of things could have probably helped as well.
LIZ PIMPER
Okay. Our next question also about the first case study, "It looks to be substandard construction and not so much a detailing issue. What can we as architects do to reduce or eliminate these types of problems in future projects?"
SARAH RUSH
Sure, I mean that kind of relates just the last answer a little bit. Having more isometric details, showing what to do at the extents of work areas, maybe thinking through what to do where the shelf angles met the columns or what you wanted to see. That might've been a way to help mitigate some of these flashing follies. But they could also be addressed in construction too. So those are some things that architects might want to consider focusing on in lieu of a typical two-dimensional detail.
LIZ PIMPER
All right, so moving to case study three, "Can you please expand on why the membrane flashing at the shelf angle should be recessed?"
SARAH RUSH
Ryan, you might be muted.
RYAN GRABOW
Thank you. I want to make sure that I'm answering the right question here, so we have two membrane flashings, the prior membrane flashing that was that loose-laid PVC, that one did not exit then that should not have been recessed because you're trying to get the water out. The problem with those types of materials is they're affected by the sun and similarly with a lot of the self-adhered, the bituminous type flashings, those green membranes we often saw in the images, those are affected by the sun and so what you do is you keep that held back, but in order to get the water off you need something projecting and that's where that piece of metal comes out to achieve that drip, that piece of metal. But the sun heats up that metal and it can overheat that bitumin, which can melt and then bleed out.
So the membrane flashings when it's sensitive to heat and sun needs to be held back, but you're adding on, in these cases we used that rigid flashing to extend it beyond the edge of the wall. So I want to make
sure that I was addressing the right question, the PVC flashing before the repairs. If the flashing doesn't get out and off the wall, you have that opportunity for that water to simply work its way back under the flashing so you do want to be careful of recessed flashing as opposed to just recessing a membrane flashing using a metal drip edge, okay?
LIZ PIMPER
All right. So this question is generally about the case studies, "Was there any point in time where there was consideration to completely rebuilding the cladding systems given the cost of the repairs that you described?"
RYAN GRABOW
I will address that on case study three. And yes, that did come up. There was discussions of do they just re-clad the entire building? Part of what we were looking at was simply where was it? And for the most part it was isolated to those areas. It would have increased the cost and these are several million dollars repairs, the costs were already pretty substantial so there was interest in keeping it minimal. And once we got away from those particular areas, the building elsewhere was actually performing quite well.
LIZ PIMPER
Sarah, this is a question for your final slides, "When you say multiple QA/QC phases, what are examples of the phases you're talking about?"
SARAH RUSH
Sure. So, well I was referring overall to kind of checking one's work, not just in construction itself so maybe that's a source of confusion. So whether that's having a third party review of the repair documents, either during the design phase of the construction, during the construction, having inspectors come or the AOR come visit the site to inspect the work, make sure it's consistent with what they're seeing and also can help make RFIs faster to answer. The performance testing too is another kind of measure to make sure that the work is performing as intended. So those are the types of things I was referring to.
RYAN GRABOW
I would like to add on something that we did with case study number three. Because we had nearly 40 balconies, we were able to take one of those and do it as a mock-up. So the contractor was able to do one balcony and we were able to go through all the repair details and we had the ability before they started, we did a series of water tests on those balconies, we knew where things were leaking and could track it. And then after they did their work and even at certain points while they were doing their work, we would do water tests, spray tests in order to assess that things were working. And by doing that mock-up, not only did we increase the confidence of what was working, we found a few spots that needed some improvement and the contractor got a better price, he got a better understanding of how much effort that the work was going to take so he could be more accurate in his overall bid.
LIZ PIMPER
All right, this is a historic question. When did flashing become commonly used? Many historic structures do not have flashing.
SARAH RUSH
Sure, I can take this one, and I'm seeing this a little bit in questions throughout the Q&A section. Flashings are more meant for drainage systems. So when you are intending to have a drainage cavity, and you're exactly right, historic systems like mass-maturing don't have that cavity, they're meant to breathe. So exactly when it transitioned, I don't know, Ryan, I would've said like '40s or '50s for sure. But it kind depends on the system and there's barrier systems today that are constructed. So that's when I would say that maybe they started. But a barrier system is kind of like a mass-maturing, slightly different, but where you never intend for water to penetrate and even then some level of redundancy is not a bad idea.
RYAN GRABOW
I would also say it also very much depends on what type of flashing you're talking about. Because if you go back to where you're talking about water tables, you would see flashing installed on those and that's probably where we get kind of that historic name of flashing is you look back at cathedrals and things, certain things like the caps of stuff, there are flashing pieces that they were installing. But you look at where you actually have mass masonry, keep in mind mass masonry, to a large degree, it's going to absorb the water and then slowly release it out. And so that transition to a cavity wall from mass masonry changes how we're thinking about the wall managing water from something that's a slow absorption to something that is drained and needs to direct that water out more quickly.
LIZ PIMPER
All right, that is all the time that we have for questions today. We've got a lot of really good questions we didn't get to that are still in our list. And as I said before, Ryan or Sarah will follow up with you to make sure that we answer your questions after the fact. Ryan, Sarah, this was a great presentation. Thank you so much and we want to thank everybody in the audience for joining us. We hope it was educational. So again, thank you so much for your time and we hope you have a great rest of the day.
RELATED INFORMATION
-
 Our professionals deliver practical repair and rehabilitation services that maximize the... MORE >Services | Repair and Rehabilitation
 -
 Ryan A. Grabow, Senior AssociateWJE Detroit MORE >People | Ryan A. Grabow, Senior Associate
 -
 Sarah V. Rush, Senior AssociateWJE Detroit MORE >People | Sarah V. Rush, Senior Associate
 -
 Our professionals balance the need to provide practical, long-term solutions with the ability to... MORE >Services | Historic Preservation